

As the 12 Days of 2FA continue, we wrap up the week with a guide to enabling two-factor authentication on Dropbox. Dropbox supports 2FA over SMS or over one of several popular authentication apps.
On a cloud storage and sharing service like Dropbox, protecting shared files often means working with others. Protecting your account with 2FA gives your documents and files the best security when the people you share them with do the same. For a more comprehensive list of cloud services that support 2FA, check twofactorauth.org.
See below for steps to enable 2FA on Dropbox, and share this tutorial so your friends and colleagues can learn how, too.
-
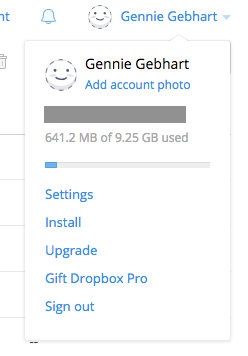
Click on your name in the top right corner and choose “Settings.” Your settings page will open in a separate tab.
-
Click the “Security” tab. Under “2-Step Verification,” click “Click to enable.”

-
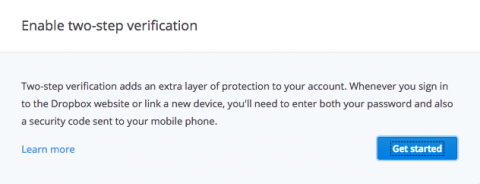
Click “Get started.”
-
At this point you’ll be asked to enter your password. Enter it and click “Next.”
-
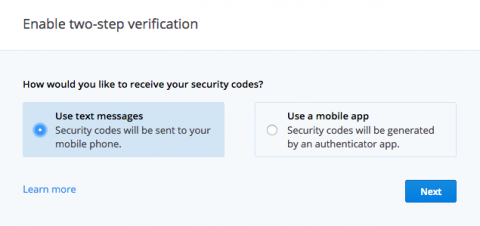
Now you have a choice between using text messages or an authenticator app as your primary 2FA method. Using text messages is selected by default. Authenticator apps are more secure and avoid a lot of the downfalls of SMS. However, text messages can be more practical if you do not use a smartphone. Consider your threat model and choose the best mode for you.
-
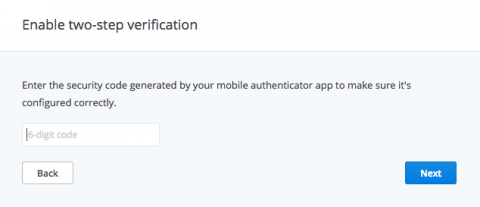
If you want to use an authenticator app, select “Use a mobile app” and click “Next.” Open your authenticator app on your mobile phone, scan the QR code, and click “Next.” Enter the code from your authenticator app (without any spaces) and click “Next.”
-
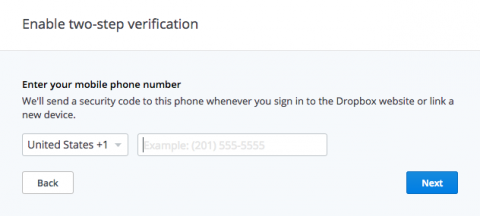
If you want to use text messages, select “Use text messages” and click “Next.” Enter a mobile phone number at which you can receive texts and click “Next.”
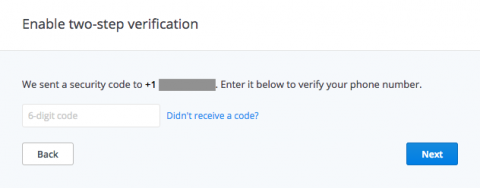
Shortly after you click, you will receive a text message with your verification code. Enter it and click “Next.”
-
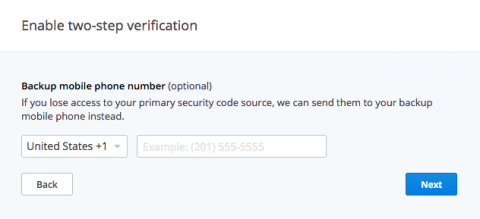
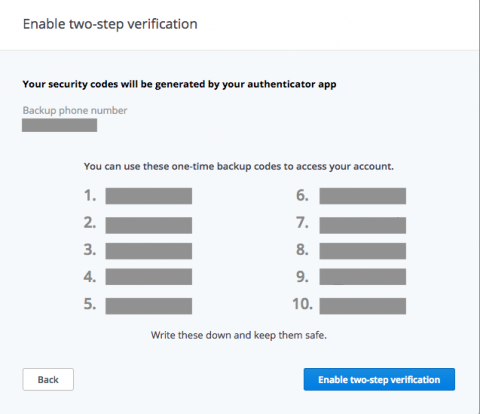
Regardless of the method you chose, you can finish up by choosing an (optional) backup phone number at which you can receive texts if you can’t access your authenticator app or primary phone number.
-
Finally, you’ll get backup or recovery codes. Write these down or print them and keep them in a safe place. Click “Next” and you’re finished.
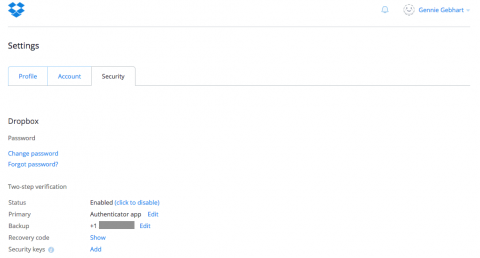
Back at your security settings, you can view your recovery codes and generate more, enable a hardware security key, and edit your primary and backup 2FA modes.
Stay tuned for more posts on two-factor authentication during the 12 Days of 2FA.